and it went fast!!!! i am back in nottingham now for the summer after my first year at RADA. it has flown by, and i am still getting use to having free time!
No excuses for not writing my blog then! So here it is my door!
So after a lot of research and the usual sketches and working out i decided that i was going to make a door with in a door. Mainly because i wanted the challenge but also to explore the idea of experimenting how set pieces can be used within a play. For example if you are doing alice in wonderland a smaller door can give the illusion that Alice has grown in size seconds after she has walked through the regular door.
I knew that i wanted to create a door in the Art nouveau style - this meant a lot of decoration.
I found that it was easier to draw the patterns i wanted full scale as opposed to using Autocad or graphics software.
 |
Inner door fret work template
|
 |
design for 'window' of the door
|
I then started work on the frame of the door using 3X1 Timbre
 |
Frame for inner door
|
The left hand side of the inner door has 2 lengths of timbre to add strength for the hinges.
For the outer door it was a slightly diffrent way of building it because of the 'window'.
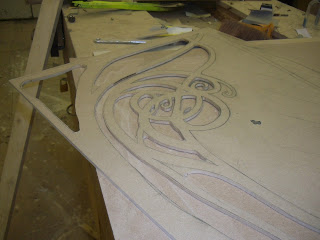
For the window i used 6mm MDF and routered out the pattern.
 |
| paper template |
 |
| Starting to router (free hand!) |
 |
Finally cut out and sanded
|
I then sandwiched the 6mm fret work between 2 pieces of 9mm MDF for support when fixing to the outer door frame
 |
| the corners are cut out to reduce weight |
I then began to build the outer frame which was a little trickier than screwing it all together as i had to be careful that i did not end up building it in such a way i was left needing to attach a piece but could not get my drill in to do it.
Now i had the skeleton of the two doors made i could get onto the more decorative work.
Like the window detail i was going to router out the fret work after i had drawn the design onto the material. The door were going to be clad/covered in 4mm MDF and the fret work was also going to be 4mm. this made it a delicate operation and a little nerve wrecking !
 |
| Transferring the design |
I cut the smaller details out first and worked from the centre outwards this was to maximise the area on which i had to lean the router.
 |
| Inner door Clad and fret work added |
 |
| Frame work of inner door - extra supports needed to be added so i had something to staple the fret work into |
 |
| Inner door placed in outer door |
For the cladding i was using some off cuts and recycled bits of floors that were used in previous shows- hence the funky paint job.....
See the rest of the process in
DOOR PART 2


No comments:
Post a Comment